- Proper site preparation—including grading, drainage planning, and soil compaction—is the foundation of a long-lasting driveway.
- Always inspect and assess existing ground conditions before paving to identify structural or drainage problems early.
- A strong sub-base made of compacted gravel or crushed stone is essential to prevent cracking, sinking, and water damage.
- Drainage and slope design must ensure water flows away from your home and the driveway surface to avoid erosion.
- Edge restraints and proper asphalt thickness enhance both the structural strength and appearance of your driveway.
- Working with asphalt contractors known for quality driveway paving ensures professional assessment, reliable materials, and precise installation.
- Allow adequate curing and maintenance time after installation to protect the surface and maximize its lifespan.
A new asphalt driveway can greatly enhance the curb appeal and functionality of your property. However, the success of any paving project depends heavily on what happens before the first layer of asphalt is poured. From evaluating your current ground conditions to ensuring proper drainage and soil stability, each preparatory step lays the foundation for a driveway that looks good and lasts for years.
In this comprehensive guide, we’ll walk you through everything you need to know about preparing your property before paving — whether you’re doing it yourself or working with asphalt contractors known for quality driveway paving.
Why Preparation Matters Before Paving
Driveway paving isn’t just about laying down asphalt. The long-term performance of your driveway depends on the condition of the base beneath it. Poorly prepared sites can lead to surface cracks, potholes, and water pooling, which not only reduce the driveway’s lifespan but also increase future maintenance costs.
A well-prepared site ensures:
- Structural integrity – The foundation beneath your driveway supports the asphalt layer and prevents shifting or sinking.
- Proper drainage – Correct grading prevents water from pooling and seeping into cracks.
- Longevity and durability – A smooth, well-prepared base allows asphalt to compact evenly, reducing the risk of cracks and early deterioration.
- Cost efficiency – Addressing soil or drainage issues before paving prevents expensive repairs later.
Skipping or rushing these steps can turn an otherwise high-quality paving job into a premature failure.
Understanding the Basics of Asphalt Driveway Installation
Before diving into the preparation steps, it’s essential to understand what goes into a typical asphalt driveway project.
An asphalt driveway is made from a mix of aggregates (like crushed stone and sand) bound together with asphalt cement. When heated and applied correctly, the mixture creates a durable, flexible surface ideal for driveways.
The typical paving process includes:
- Excavation – Removing existing pavement or topsoil to expose stable subgrade.
- Grading – Leveling the area to promote proper drainage.
- Installing the sub-base – Laying and compacting crushed stone or gravel for stability.
- Asphalt application – Pouring and compacting hot asphalt in one or more layers.
- Curing and finishing – Allowing the asphalt to cool and harden properly before use.
Each of these steps depends on thorough preparation. Contractors who specialize in high-quality driveway paving invest significant time in the early phases to ensure the final surface is strong and even.
Step 1: Evaluate the Existing Driveway or Ground Conditions
Before any paving can begin, assess the current state of your driveway or the bare ground where the new one will be installed.
Key things to check:
- Surface condition: Identify any potholes, cracks, or uneven areas. If your existing driveway has major structural issues, replacement—not resurfacing—may be necessary.
- Soil composition: Clay-heavy or unstable soil requires reinforcement or additional grading to prevent settling.
- Drainage problems: Look for standing water or erosion after rain. These issues must be resolved before paving to avoid long-term damage.
- Vegetation and roots: Grass, weeds, and tree roots can weaken the foundation if not removed completely.
Professional inspection is often recommended. Asphalt contractors known for quality driveway paving typically start every project with a thorough site assessment and soil evaluation to ensure the ground is ready to support a durable surface.
Step 2: Plan the Driveway Layout and Design
Proper planning ensures your new driveway is both functional and visually appealing.
Factors to consider:
- Driveway dimensions: Standard driveways are typically 10–12 feet wide for single cars and 20–24 feet for double driveways, but customization depends on your property layout.
- Turnaround space: If space allows, consider adding extra width or a circular design for easier maneuvering.
- Aesthetic features: Add borders, paver edges, or landscaping features for curb appeal.
- Slope and grading: A driveway should slope at least 2% away from your home or garage to encourage proper water runoff.
You can work with your contractor to create a design that fits your needs. Some even use 3D modeling software to help you visualize the finished product before paving begins.
Step 3: Address Drainage and Grading
Poor drainage is one of the main causes of driveway damage over time. Without proper water management, even the best asphalt will deteriorate prematurely.
Drainage planning should include:
- Surface slope: Ensure the driveway directs water away from structures and into appropriate runoff areas.
- French drains or trench drains: Useful in low-lying properties where water tends to pool.
- Swales or grassy ditches: Eco-friendly options for diverting excess rainwater.
- Edge grading: Prevents water from seeping beneath the asphalt edges and causing erosion.
If your yard sits on uneven terrain or near a slope, professional grading services are strongly recommended. Contractors who focus on long-lasting driveway paving know that a well-graded site prevents moisture damage and foundation shifts in the future.
Step 4: Clear and Prepare the Site
Before construction begins, the site must be cleared of debris and obstacles. This stage sets the physical foundation for your new driveway.
Site preparation checklist:
- Remove old pavement: If replacing an existing driveway, break up and haul away old asphalt or concrete.
- Excavate the soil: Dig down to the proper depth, typically 4 to 8 inches, depending on the soil type and expected vehicle load.
- Eliminate vegetation: Remove all grass, roots, and organic material to prevent future cracking or shifting.
- Mark utilities: Contact local utility services to identify underground lines before excavation.
- Compact the subgrade: The soil beneath the base should be compacted firmly to prevent future settling.
Professional asphalt paving contractors use heavy machinery such as rollers and plate compactors to ensure the subgrade is level and solid before the base materials are installed.
Step 5: Build a Strong Sub-Base
The sub-base is the backbone of your driveway. It’s what gives the asphalt its strength and durability. Without a stable base, the top layer will eventually crack and deform.
Important details about the sub-base:
- Material: Typically a mix of crushed stone or gravel designed for drainage and compaction.
- Depth: Usually 4–6 inches for residential driveways, but more for heavier loads.
- Compaction: Layers are compacted in increments to ensure even density.
- Testing: Contractors often perform a density test to verify proper compaction before moving forward.
A well-built sub-base acts as both a stabilizer and a drainage layer, keeping moisture from reaching the soil beneath. Asphalt contractors known for quality driveway paving pay close attention to this phase, as it determines the structural integrity of the final surface.
Step 6: Install Edge Restraints and Borders
Edge restraints aren’t just decorative — they play a functional role in maintaining your driveway’s shape and preventing crumbling.
Benefits of installing proper edges:
- Structural support: Keeps the asphalt from spreading or cracking under vehicle pressure.
- Improved durability: Reduces erosion along the sides.
- Aesthetic value: Provides a clean, defined look that enhances the property’s appearance.
You can choose from concrete curbs, metal edging, or decorative stone borders, depending on your budget and style preferences. A well-defined edge helps maintain the integrity of the paved surface for years to come.
Step 7: Choose the Right Asphalt Mix and Thickness
Not all asphalt is created equal. The right mix depends on your local climate, soil conditions, and intended use.
Choosing the right materials:
- Residential mix: Designed for light vehicle traffic and moderate use.
- Commercial or heavy-duty mix: Best for driveways that will bear heavier vehicles or frequent traffic.
- Thickness: A typical residential driveway requires 2–3 inches of compacted asphalt, laid over a solid base.
- Climate considerations: In colder regions, asphalt with a flexible binder resists cracking from freeze-thaw cycles, while warmer areas benefit from stiffer mixes that resist rutting.
Experienced contractors help select the right mix based on these factors. Using the correct asphalt blend and thickness ensures your driveway remains smooth, stable, and resistant to damage over time.
Step 8: Prepare for Paving Day
Once the groundwork is complete, it’s time to coordinate logistics before the paving begins.
What to do before the asphalt is poured:
- Confirm project details: Review the timeline, cost estimate, and work plan with your contractor.
- Arrange alternate parking: Keep vehicles off the property for at least 48–72 hours after paving.
- Protect surrounding areas: Use tarps or barriers to shield plants, lawns, and structures from dust or debris.
- Monitor weather conditions: Ideal paving conditions are dry, with temperatures between 50°F and 85°F.
- Final inspection: Walk the site with your contractor to confirm readiness before asphalt application.
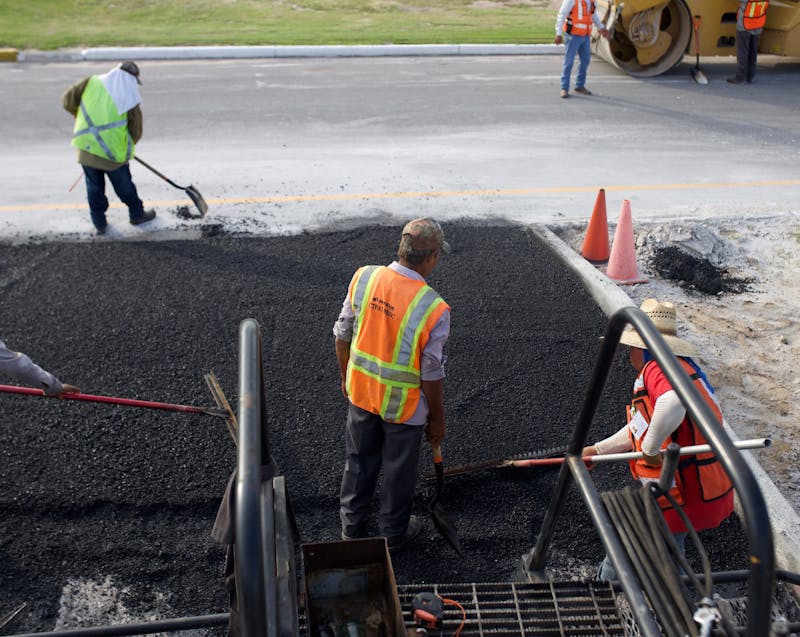
A professional crew will then pour and compact the asphalt in layers, ensuring a uniform surface and a tight bond between materials.
Step 9: Post-Installation Care and Curing
Even after the paving is complete, proper care during the curing process ensures your new driveway reaches maximum strength.
Curing and maintenance tips:
- Curing time: Allow at least 48 hours before driving on the surface, and 2–4 weeks before sealing.
- Avoid heavy loads: Do not park trailers or large vehicles on the new driveway until it has fully hardened.
- Prevent surface damage: Avoid sharp turns or using vehicle stands that can indent the surface.
- Sealcoating: Apply a protective seal 6–12 months after installation to preserve color, prevent oxidation, and extend lifespan.
- Regular upkeep: Clean spills promptly and fill small cracks early to avoid water infiltration.
By following these guidelines, homeowners can significantly extend the life and look of their investment.
Common Mistakes to Avoid Before Paving
Even the best asphalt can fail if proper preparation steps are skipped. Here are common mistakes to avoid:
- Neglecting drainage issues: Water is asphalt’s worst enemy; always ensure proper runoff.
- Poor compaction: Soft or uneven soil leads to sinking and surface deformation.
- Skipping the base layer: Never lay asphalt directly over dirt or loose gravel.
- Choosing unqualified contractors: Low bids often result in poor workmanship or inferior materials.
- Ignoring weather: Paving in cold or wet conditions can prevent proper asphalt bonding.
- Rushing the project: Allow sufficient curing and inspection time before use.
Learning from these mistakes can save you time, money, and frustration in the long run.
Working with Professional Asphalt Contractors
Hiring experienced professionals ensures that your project is completed to the highest standards. Skilled contractors understand the importance of preparation and use proven techniques to achieve smooth, long-lasting driveways.
What to look for in a contractor:
- Licensing and insurance: Protect yourself from liability and ensure the contractor meets industry standards.
- Experience and reviews: Choose asphalt contractors known for quality driveway paving and consistent customer satisfaction.
- Transparent estimates: Request a detailed cost breakdown that includes base work, materials, and labor.
- Written contracts and warranties: Ensure all terms, timelines, and maintenance responsibilities are documented.
- Professional equipment and crew: A qualified team with the right tools ensures efficiency and accuracy.
Investing in a reliable contractor may cost more initially, but it will save you from frequent repairs and replacements down the road.
Conclusion: Setting the Foundation for a Durable Driveway
Preparing your property for asphalt paving is more than just a preliminary step — it’s the cornerstone of a successful project. From evaluating soil conditions and drainage to installing a sturdy sub-base and choosing the right materials, every detail matters.
Homeowners who take the time to plan and prepare properly will enjoy a driveway that not only looks great but also stands the test of time. Partnering with asphalt contractors known for quality driveway paving ensures that every aspect — from design to installation — is handled with precision and care.
Whether you’re replacing an old surface or installing a brand-new driveway, remember this: a solid foundation built through careful preparation is the secret to achieving a smooth, durable, and beautiful finish that enhances your home for decades to come.